Monday, May 4, 2015

The Trunk Company - Rexburg, Idaho

I truly have to laugh when I read the title to my post. So far, I have only built two storage trunks--one for me and one to sell. My idea of selling my trunks is very far from being a "company," but I like the way it sounds. I enjoy coming up with catchy names for the businesses I will own and run in the future--like Fabric Crush, or Top-Notch Upholstery. Nothing wrong with dreaming big, right?

As I said in my previous post, I love to work with wood. After having some experience with reupholstery, I can honestly say I will make another trunk before I have to reupholster a sofa. I still love reupholstery, but with woodworking you can go straight into creating--there is no prepping stage. With reupholstery, the prepping stage cannot be avoided. Removing old, dirty, stained fabric and dealing with a million staples adds another step--and not an easy one-- before I can get to the fun part and start transforming a furniture piece. I guess I am just a little impatient, and woodworking gets me to the end much faster than I can with reupholstery.


If you are on the look out for a storage chest/trunk that will serve as a coffee table, or just storage for the end of your bed, stay tuned for a new store in town that will open at the end of this month. My trunks will be sold at this unique store, and I cannot wait for you to see them in person.  
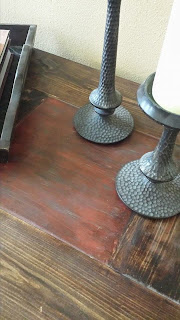
This trunk was built with maple hardwoods and pine. 


Every trunk will be beautiful and different. I will be trying different stains, colors, and hardware to make them special and not the cookie cutter type.  On this particular one I used a custom finish for the stain--dark walnut with some other hand applied colors to give the finish some depth. 


I paid special attention to the handles, back hinges, and front latch. 
It is a beautiful piece.
I almost do not want to get rid of it, but you can only have so many storage trunks in a house 
before it starts to look ridiculous. Lol!


This is a BRAND-NEW item and up for grabs. Nothing old or refurbished was used on this baby. I carefully selected all the wood and hardware to build it just for you. 

So, what are you waiting for? =-)


Woodworking and Plantains

Woodworking has always had a place in my heart. I like the simplicity of just measuring and cutting pieces of wood and how really beautiful things can be created from just assembling those pieces together. Many years ago, Melody Hancock, a good friend of mine from Arizona, shared her woodworking passion with me. We made about 30 plantain smashers (or"tostoneras" for those that are familiar with this term) to give away to family and friends for Christmas. I drew the design and she showed me how to cut, sand and assemble these cute things. If you have never seen one,  I will enlighten you right at this moment:

It is quite the gadget let me tell you. =-) 


This is what you can make with this wooden tool. In Puerto Rico, they are called "tostones." And they are absolutely delicious! Yes, they are fried. There is no going around that my friends. If you want to experience heaven in just one bite, you gotta fry these babies. Yumm!

Now, this is what plantains look like before they are fried. To make tostones, they have to be completely green. If they have a bit of yellow is totally fine- you will just end up with a toston that tastes a bit sweet. 


Use a sharp knife to cut off the tips and then slice the tough skin open. With the same knife, push the skin away from the goodness inside until the plantain is uncovered. You would think that these beauties peel just like a ripe banana would. Nope. The skin actually sticks to the inside a bit and you need the knife to separate it. But it is not a hard process at all!


Then you cut them into rounds of about 1/2 inch. Some people cut them a little thicker to end up with a bigger toston. If you do that you may have to use more oil and fry them a bit longer to get them to soften up before smashing. 

As I said before, they need to be partially fried before the smashing step. I cook them for a few minutes on both sides at medium temperature. Some people use a sauce pan and add plenty oil to cover them. I try to avoid using too much oil, so I just use a regular skillet with enough oil to cover the bottom of the pan, then I let them cook on both sides until they soften up a bit. Do not let them 
crisp up at this stage.

When a fork can be inserted into them, they are ready to be flattened! Put a bit of oil in the center of the circle (just use a spoon a get some from the skillet) and on the lid, then smash away. Remove the toston with a fork and throw back in the oil. Continue with the same process until finished. When they look crisp and golden (use a spatula to turn them half way), remove from the oil and have a plate prepared with a couple paper towels to drain the tostones. Sprinkle with a generous amount of salt. Serve with rice and beans or eat them as a snack. Enjoy!

I honestly had no intentions to write a post about plantains. Lol! I am glad that I did, though.