Monday, June 13, 2016

100% Whole Wheat Pancakes

 Hello friends!
Today I’m going to share with you my MOST FAVORITE 100% Whole Wheat Pancakes recipe!

PANCAKES2

It is our go-to recipe for Saturday morning pancakes. Yum! Are you ready? Let’s do it!
Ingredients list:
2 cups 100% whole wheat flour (I grind my own, but you could use store-bought.)
2 cups fresh buttermilk (find it the refrigerated milk section).
¼ tsp salt
1 tsp baking soda
¾ tsp baking powder
½ cup oil (olive oil or canola)
2 eggs

How to do it:
Mix the wet ingredients and add the dry ingredients (you could mix the flour with the spices and then add it to the wet mix, but I never do that—I’m too lazy!). You may add an extra ½ cup of buttermilk if you think the batter is too thick. But remember that you want it to be thick. Fresh buttermilk is naturally thick and that’s the key ingredient to these amazing pancakes!
Mix fully to combine. Do not overmix.

20160416_110211

Get your griddle or skillet heated up to medium or medium/high (depends on your stove) and make your pancakes! I use a 1/3 cup measuring cup to scoop out the mix and pour on the skillet (the mix will be VERY thick!).

20160416_110555

Let them cook on one side for a few minutes (resist the temptation of poking/flattening your pancakes!) and then turn them with a spatula and cook the other side.
And that’s it! Next time I make them I’m planning on doing a short video so you can see how I cook them. I always learn better when I can see things being done!

pancakes

As far as the whole wheat flour goes, I like to buy whole white wheat kernels and grind them up (FYI-whole white wheat flour is NOT the same as white flour). I love my Nutrimill wheat grinder for this task. For pancakes, I prefer this type of wheat over the red wheat that has more of a “wheaty” flavor. But I’ve used both with this recipe and they always turn out delicious! Even my brother in law who’s not a big fan of whole wheat thinks they are fabulous!
I like to use 100% pure maple syrup as my topping--and butter, of course!--but you may put on them whatever you want!

PANCAKES3

Let me know if you have any questions about this recipe. I love it so much and I hope it becomes your favorite too!

X0,
Beverly

Wednesday, January 20, 2016

DIY Kitchen Towels

Hello friends! I actually made these cute kitchen towels back in November, and I never got around to writing a post about them. Now that the Christmas rush is long gone, I can take a bit of time to tell you about them. They are so fun to make! I call them Kitchen Towels, although some people call them Tea Towels, but I honestly don’t know the difference between the two. So… since we don’t ever drink tea in our household, I thought Kitchen Towels was more appropriate. Don’t you think? After all, they will be hanging in my kitchen area, right? It is so fun to have these pretty towels in a place where I can admire them all day long (yes, I spend that much time in the kitchen. I love it!).
20151202_102955
The great thing about these towels is that you can draw on them anything you want! I was in my Laundry room last night and I thought it would be cute to hang one by the sink that says “For same day service, do it yourself!” Haha. Anyway, back to how I made these. I need to focus. =-)
Materials needed:
Pre shrunk, unbleached, 100% cotton fabric
Fabric Markers in the colors of your choice
Sewing machine and matching thread
Scissors
Iron and ironing board

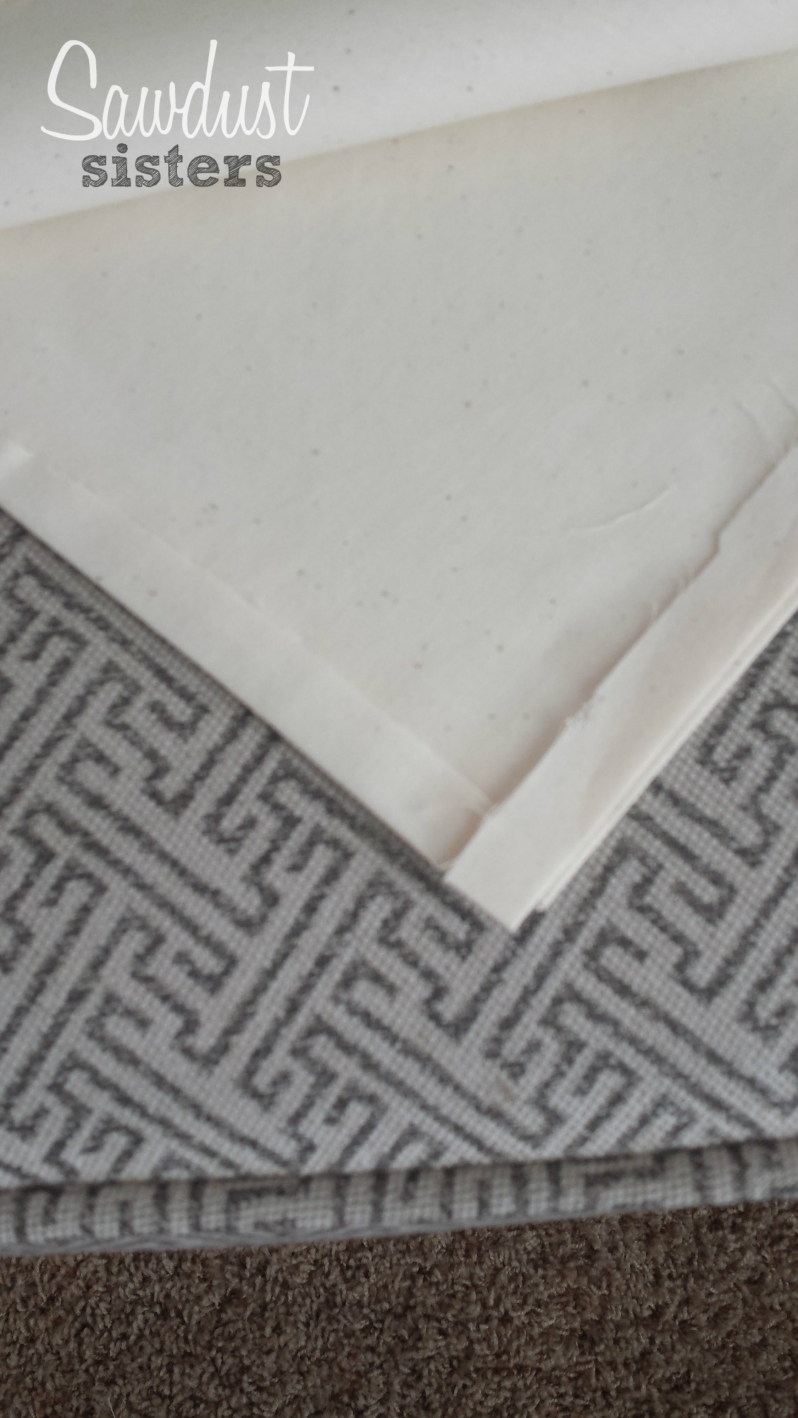
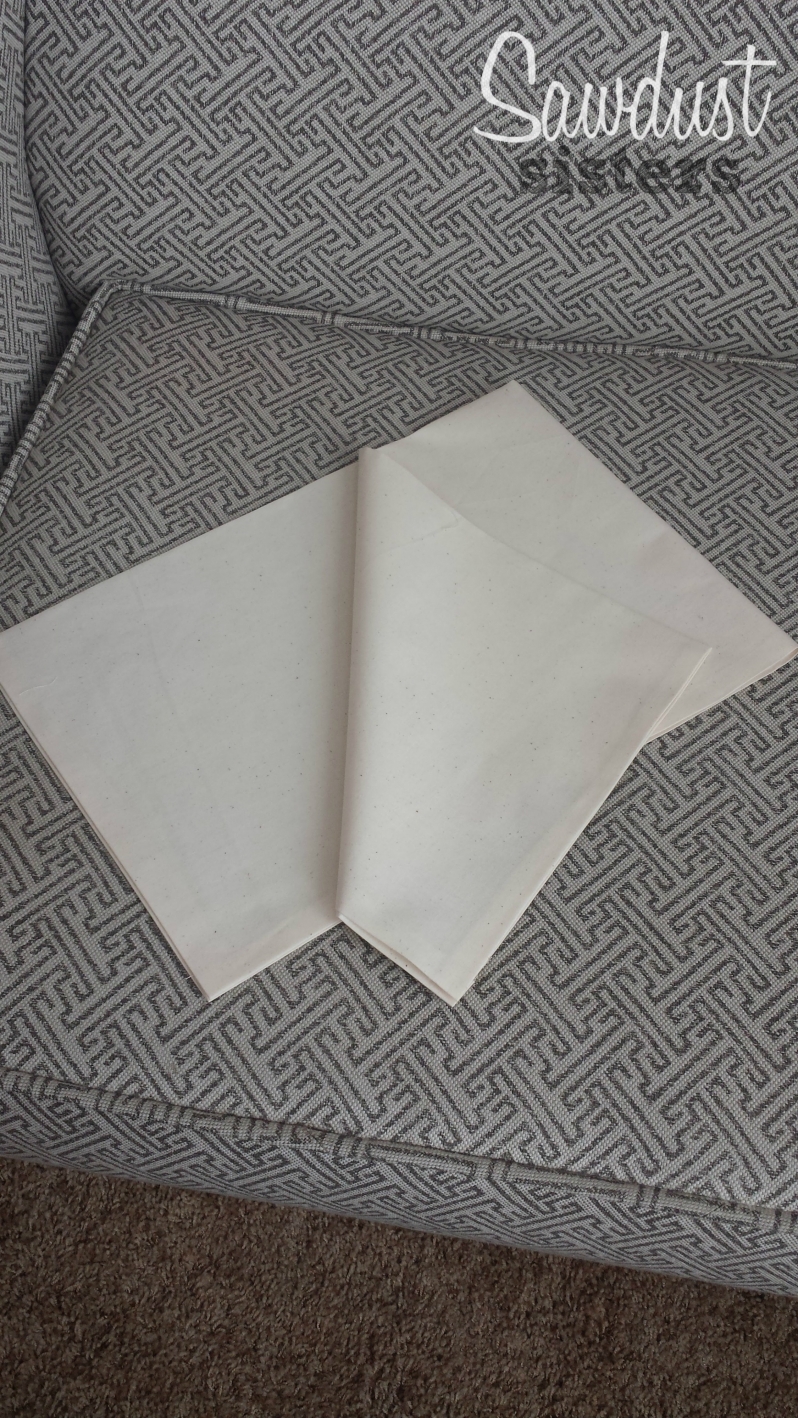
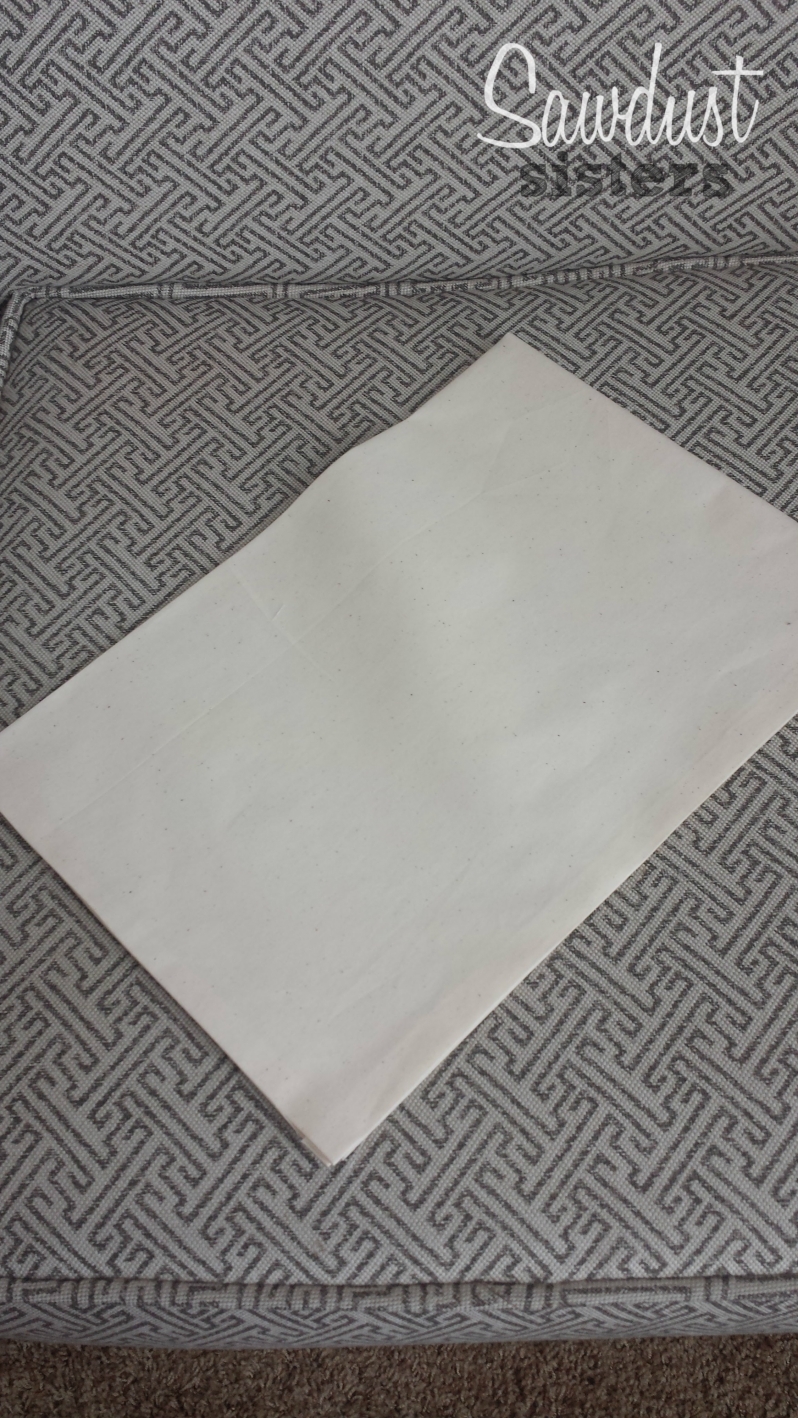
First, you need to determine the size of your towel. I used one that I already had to have an idea of how big to cut them. Once you have your large rectangle cut, you need to fold in all the edges and iron them in place:
20151202_102322
You could also double fold at this step (which will make it easier when it is time to sew), but I didn’t think of doing it for some reason. Anywhoo, when you have all of the edges folded and ironed, it is much easier to sew it all in a neat way.
20151202_102339
Here you can see how all the edges are nicely ironed. My towel is pretty big–it is folded vertically and horizontally. Now, the design will go on just the part that will be showing and facing out; only 1/4 of the towel will be decorated. You are welcome to do the whole thing, but for me it was plenty to do the bottom right corner as I made quite a few of them to give out as gifts for Christmas.
20151202_102310
So, once you have everything ready to go, it is time to sew those edges. If you can’t sew, maybe you could find towels like these at Hobby Lobby. I think I saw some similar ones, but they were pricey. Instead, I chose to buy the fabric and I only spent about $6.00. The fabric cost ranges between $2-6 dollars, but I had a 50% coupon that I used and I saved some big bucks. I think each one of these costs about a dollar to make. I know!
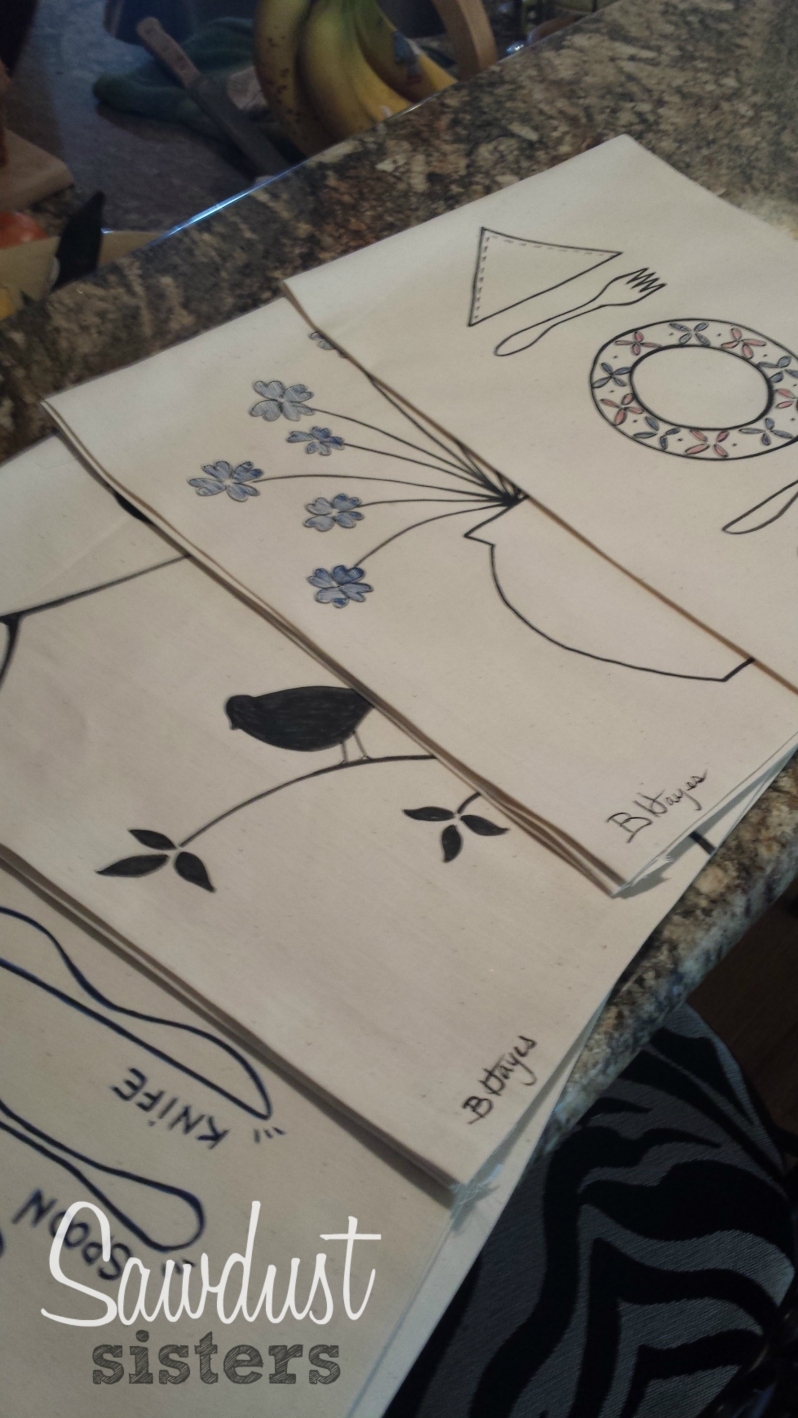
Now, this next step can be scary, but if you are a good artist and your hand does not shake you will be just fine. I actually browsed the Internet for ideas on what to put on these towels and I found some great inspiration. I also kept in mind who I was giving these towels to and their decor style. Once I figured out what I was drawing, I drew my images on white paper first with regular black marker. Once I was happy with the end result, I slipped it under the fabric and traced it with my fabric marker. It shows right through! It was so easy. If you don’t think you could draw anything more than a stick man,  you could try finding an image that you love online. Then you could print it to the size that you need, and trace it with no problem.
20151202_103326
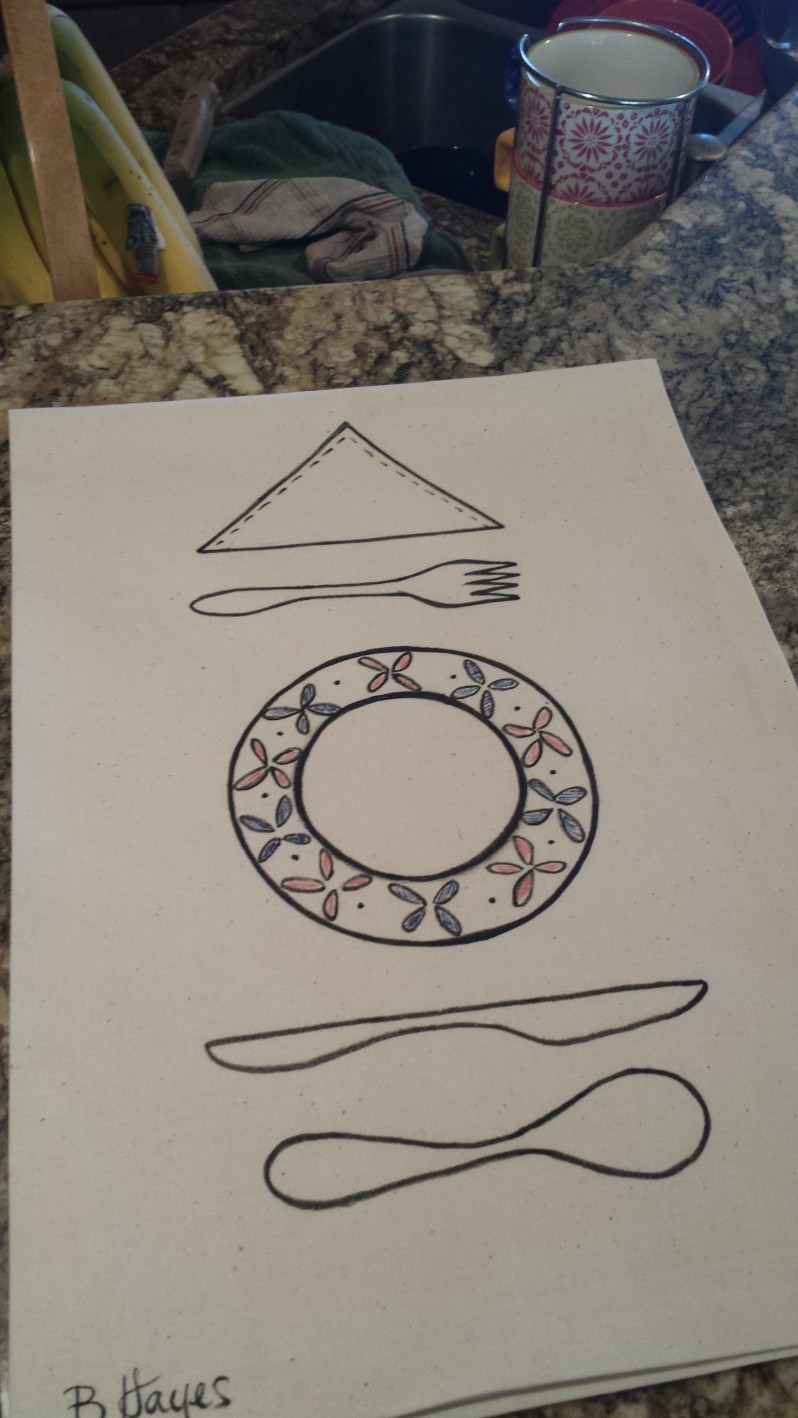
This is the one I made for my mom! I love colorful dinnerware, and this plate reminds me of something I would find in a fancy Mexican restaurant down in Oaxaca, Mexico.
20151203_120100
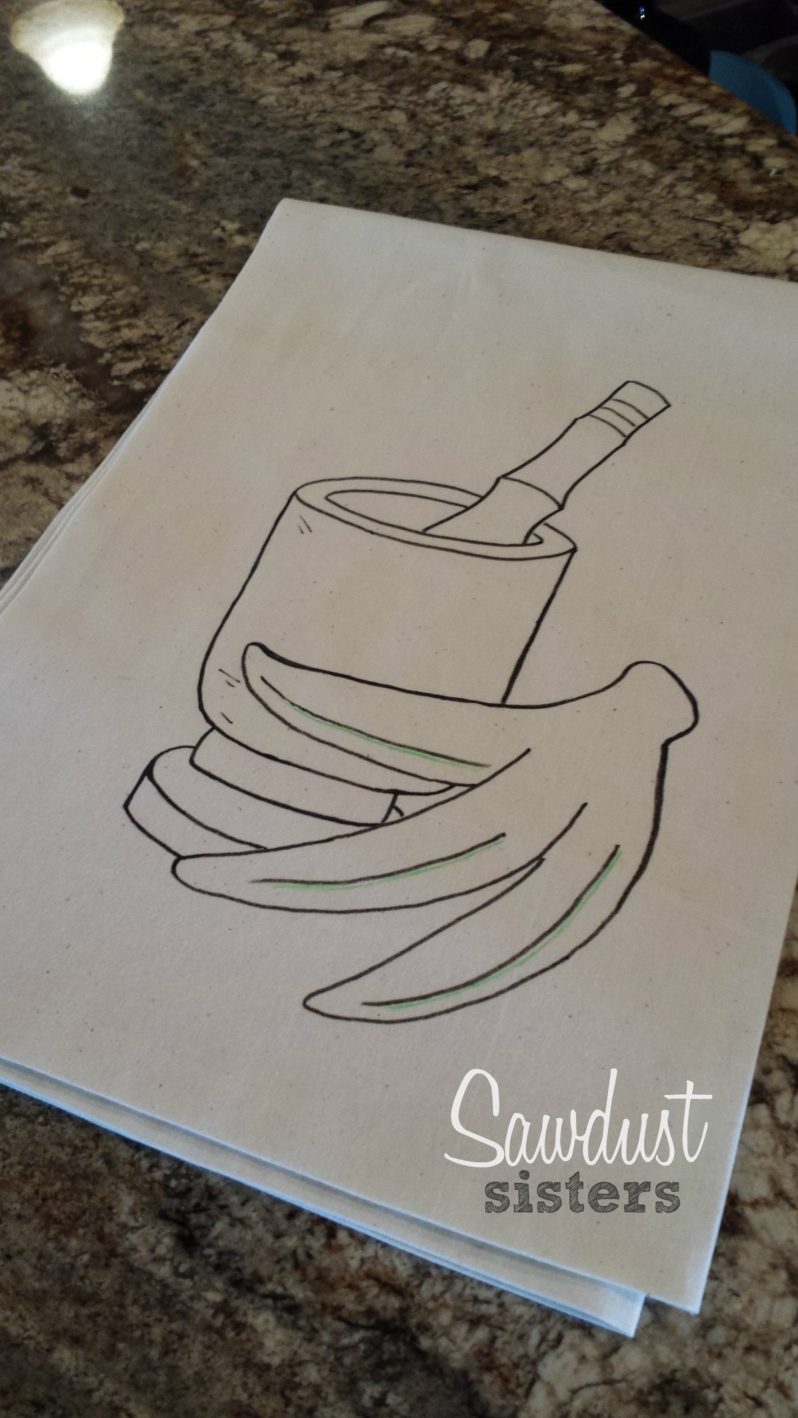
This one I gave to my aunt Aleyda. I actually have this morter (or “pilon” like we say in Puerto Rico), and I just placed it in front of me and started drawing. The bananas on the front represent the green plantains that we use in Puerto Rico to make “mofongo” and “tostones”.
20151202_102533
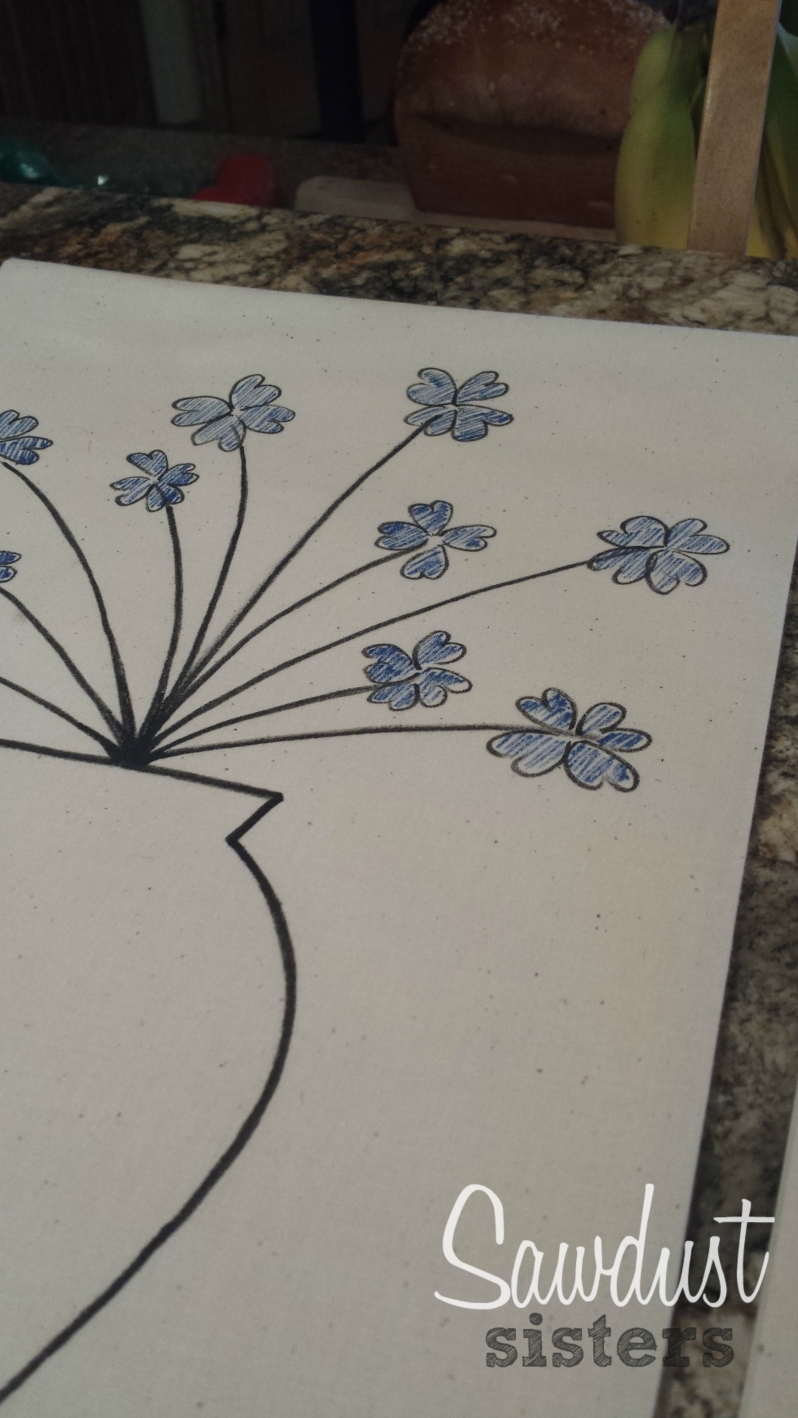
This one I made for my sawdust sister! It fits her decor style really well and it makes me happy to see it hanging in her modern kitchen.
20151202_102545
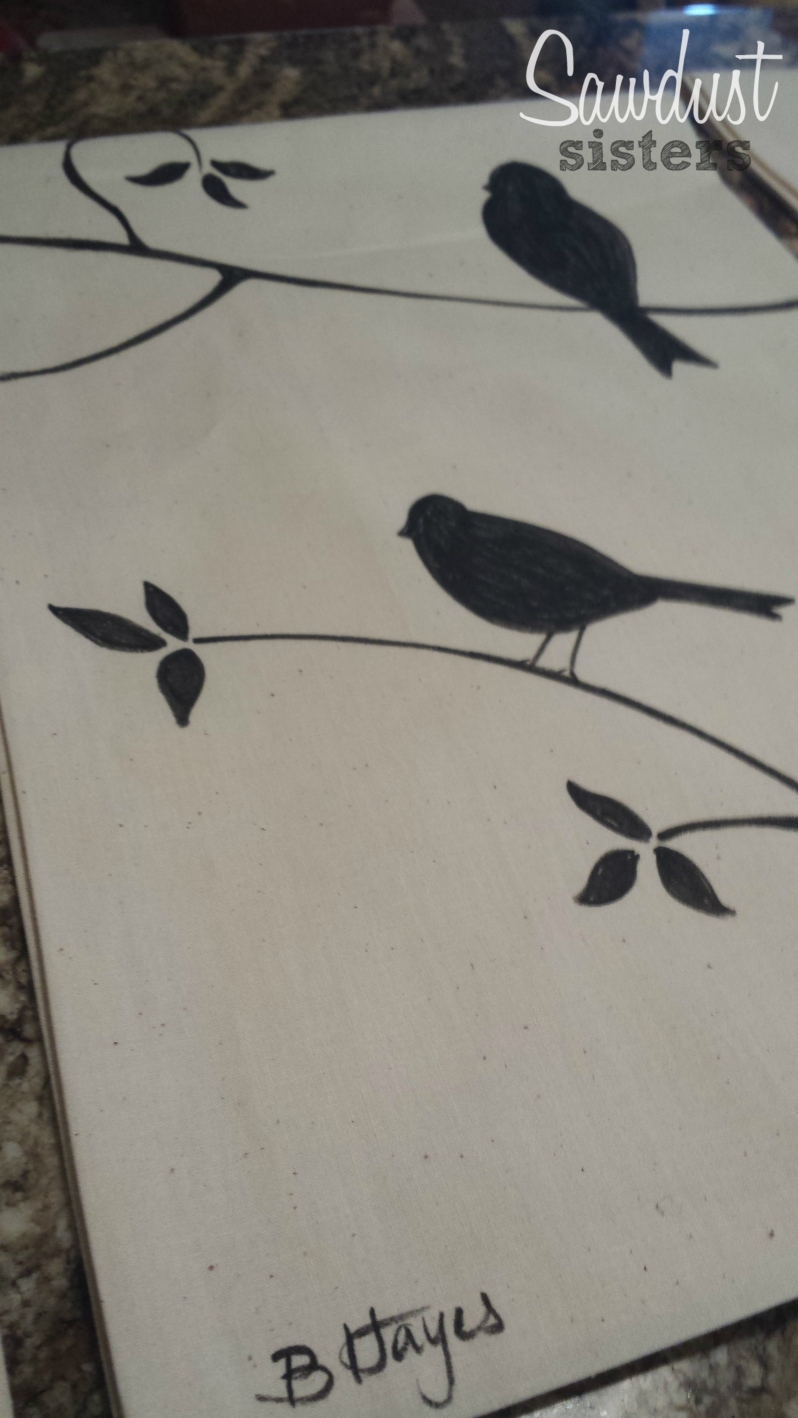
This one I sent to my sister in law, Lidia. I hope she likes it. When we stayed at her house down in FL I noticed there were a lot of birds chirping away in the area (no alligators, luckily!). So, this towel is a reflection of sunny Florida and the beautiful lake that sits only a few yards away from their back door.
So that’s it! As you can tell, I actually drew the designs before I actually sewed the edges. Unfortunately, I don’t have pictures of the finished seams. Just imagine a seam the same color as the fabric that goes around the whole edge.
My sister washed hers and the design did not fade at all!  Just make sure that once you are done drawing your design to iron it really well. It will help to set the image unto the fabric. And of course, the better quality of the fabric marker, the longer lasting your design will be. I bought mine at Hobby Lobby and I love my black one. I like to do mostly black and then do some accent colors here and there.
Ok, I will stop talking now! Let me know if you have any other questions about this project!
Much love – Beverly

Monday, November 30, 2015

DI Chandelier Makeover

Thanks for stopping by! Follow us on Instagram, Pinterest, and Facebook to keep up with our latest projects!
Well…hello friends! It’s has been a long while since I last posted on our blog. I am just grateful to my sister and her desire to share her breast cancer story with all of you while I took a little break. Her story is inspiring. I am grateful for her strength and desire to keep moving forward while going through this difficult and scary time in her life. I am grateful she is still here with us and I love her. =-)
A few weeks ago I posted some pictures of a small chandelier I found at DI. My friend Allysun saw it first; she was thinking it would look good in her living area, but after a few minutes of pondering she decided it did not really fit the style she was going for. That’s when I jumped in and said “Are you sure you don’t want it? If you don’t I will take it!.”  “Go for it.” – she said. A few minutes later this young mom saw me holding my great find and told me how lucky I was that I had found such a treasure. She had been looking for one for a long time, but her son had to go to the bathroom, and when she came back this awesome find was hanging from my left hand. Mmmmmm…should I have given it to her? Now that I think about it I feel kind of bad. Oh well…too late now to feel bad. Note to this mom: when you see something you like at DI, grab it!
I was not really sure what to do with it at first or where I would actually hang it. Initially I wanted to replace the shades, but after searching on the internet I realized these kinds of shades are not cheap–at least not the ones that I liked. Here is a before picture of the chanderlier:
chandbefore
I only paid $10.00 for it, and it is heavy wrought iron. After pondering for a bit I decided I wanted to paint it white and distress it. I thought about doing a glaze over it too, but since the base was a dark brown I could just distress it and have some of the brown color show on all the edges.
I took it to my garage and spray painted the whole thing. I even spray painted the sleeves where the bulbs are screwed into. Make sure you give it several coats and that you cover all the little nooks and crannies. Start spraying it in the position shown (remove shades first, of course) and then turn over. I do the bottom last as it is the area that will show the most once it hangs from the ceiling.
One word of advice – do not buy cheap spray paint. I bought a generic brand that was on sale at Ace Hardware and the paint was horrible – no matter how much I shook the can the paint was still coming out clumpy and gross. I still used it, but then I bought some Krylon spray paint in satin and it was sooo heavenly smooth and steady while I sprayed. So…note to self (and to you!): cheapy spray paint gives you cheapy results (not to be confused with ‘chippy’ – we do want that!).
Once the paint was completely dry, I took a piece of sandpaper (medium coarseness) and went to town distressing the whole thing. I focused on the areas that would normally wear off with the years, like all the edges and some crevices here and there. Some people like a lot of distressing and some don’t – and that’s Ok! Just do enough of it until you get the look that you are looking for.
chandelier4
I tried covering the shades with scrapbooking paper, and even though the result was decent, when I put them on I did not like the look. Once I had my husband help me with the wiring and hanging, I decided it looked way better without the shades. It looks classy and dresses up my daughter’s bedroom very nicely.
chanderlier7
Here are some pictures of the end result. We have plans to repaint her whole room and do a different color scheme, and the chandelier will still go perfectly with whatever we choose to do.
chandelier2
Enjoy the pictures! Let me know if you have any questions about this quick and easy project!
chandelier1
chandelier5
See you soon!
-Beverly

DIY Nativity Stable

DIY Nativity Stable

Hello friends! Thanks for stopping by! Follow us on Instagram, Pinterest, and Facebook to keep up with our latest projects!
As promised, I will show you how easy it is to build a pretty stable for your nativity scene out of wood scraps. Are you ready?
stable9
Materials needed:
Wood ( I used plywood from my storage trunk project).
Miter saw
Screws
Wood glue
Chalk paint or stain
Sandpaper
stableparts
These are my 4 pieces of wood already cut. I drilled pocket holes on my two longer pieces deep enough to fit my 1 1/4 inch screws.  I used a Kreg Jig to drill the pocket holes. If you have never used one, don’t panic. This small tool comes with easy to follow intructions and will tell you exactly what to do to get the right depth for your pocket holes. It is all determined by how thick your wood is (mine is 3/4 inches thick). Here are the measurements of my wood pieces:
Right hand square piece – 10 X 10 inches
Bottom left piece – 5 X 10 inches
Top left longer pieces – 3 X 14 inches each
Now, these measurements are based on the size of my tallest figurine. Joseph is about 11.5 inches, and I decided to make the stable three inches taller to make it roomier and more comfortable for them. =-) The top piece is 1/2 the size of the bottom piece. However, it all depends on what you want your end result to look like. I cut the bottom piece first, placed the figurines on it, and then decided the height and width of the side pieces. My nativity is from Hobby Lobby and with a coupon of 40% off I paid $30.00. I bought this back in October, and I am so glad I did! I was there last week and there were no nativities left. Here is what the box looks like:
nativity2
So, let me show how I did this. I attached the side pieces to the base first:
stable1
The top was next:
stable2
And this is the end result ready for paint or stain:
stable3
Don’t forget to use wood glue before you screw the pieces together. Apply the glue where the pieces touch, then screw. It will give you a very sturdy bond. Any wood glue works. You may find it at any craft store.
Ok, now we move on to paint. But first I wanted to stain it as I was planning on distressing the whole thing. I wanted the dark stain to show on the edges. However, if that is not your thing and you want the end result to be a solid warm white, go for it! You can skip the following step.
stable4-bev
I took an old rag, dipped it in the stain, and started applying it. A small amount goes a long way! I used the same stain I have used for many of my projects. It is the Minwax brand in the dark walnut color. You may want to protect the area where you are staining. Put some newspaper or wax paper down for easy clean up. Also, take the time to change into clothes that you won’t care if they get stained.
Note to self: Follow my own advice. =-)
(As a side note, if you are wondering how I hand painted the back wall in my dining room, you can find the tutorial here.)
stable5
My daughter Natalia wanted me keep it like this. I really liked it too, but it would just get lost with all the wood finishes that there are in my kitchen. My buffet is also a dark wood stain, and I wanted the stable to blend with the nativity and to stand out on the buffet. But, if the furniture piece you are placing your nativity on is white or light colored, I would stick with the stain look. It is all about what you have going on in your space.
Unfortunately, I don’t have pictures of my painting process. I got too excited to finish and forgot all about taking more pictures. But, I will explain what I did.
  1. I applied some vaseline in the areas where I wanted the paint to chip off (most of the edges and some random areas).
  2. I painted the whole thing with chalk paint (NOT chalkboard paint) in a warm white. It took about three coats as chalk paint soaks into the wood easily and dries really fast.
  3. I took a sanding block and sanded all of the edges and random areas where I applied the vaseline.
  4. I applied more paint or stain in areas where I thought I sanded too much, and sanded more where I thought it needed it. It was a good 10 minutes or more of touching up, sanding, stepping back to look at it, and touching up again. =-)
stable11
I am pleased with the results! I ended up placing a red runner under it to give it more depth, and added my DIY Christmas trees. I made these before I started blogging – someday I will write a post on how to make them.
stable10
stable12
stable8
The glass lamp is a DI find and I replaced the shade. The snowy branches I bought at a local craft store, and I still have to fill my glass vases on the right with something Christmasy.
Thank you for stopping by! Let me know if you have any other questions.
-Beverly

Tuesday, August 18, 2015

Floor Length Mirror Tutorial

Floor length Mirror Tutorial – No Kreg Jig Required!

Thanks for stopping by! Follow us on Instagram, Pinterest, and Facebook to keep up with our latest projects!
Today I want to share a quick tutorial on a simple way to frame a mirror. This frameless mirror was a freebie from a friend of mine who was moving and did not want to take it with her. It was actually double the width and I had it cut down the middle at this glass shop in town, which gave me two nice and long pieces to work with. The second piece is still frameless. Someday I will get to it…
leaningmirror6
Now that I have shown you the end result, let’s start from the beginning:
leaningmirror2
This is what the mirror looked like once I had it cut. It was a good size for a leaning mirror–all it needed was a nice thick frame!
leaningmirror1
I knew that I did not want to finish the corners at a 45 degree angle, which simplified my project even more since I did not own any tools back when I did this. My wood planks were about 7 inches wide. So….this is probably the best way to tell you how I figured out the length of my four pieces:
Horizontal piece: width of the mirror + (width of wood X 2) – 1/2 inch.  So, if your mirror’s width is 20 inches and your wood planks are 7 inches wide, then your horizontal piece will be 20 inches + 14 inches -1/2 inch = 33.5 inches. You will need to cut two of these.
Vertical piece: Length of mirror – 1/2 inch. So, if your length is 60 inches, then your vertical piece will be 59.5 inches. You will need to cut two of these.
Note: Remember that these wood pieces will be sitting on top of the mirror. The -1/2 inch measurement is the distance from the mirror edge that will be behind the mirror, which when split by half will give you a 1/4 inch distance all around that will sit behind the frame. If you think that is not enough, you may increase this measurement to -3/4 inch or even up to 1 inch. I just wanted as much of the mirror to show once the frame was attached.
leaningmirror4
Once I had my four pieces cut, I actually used glue and a staple gun (Can you see the staples?) to attach them. A Kreg Jig would have been phenomenal for this project, but I made it work without one. Yay! I added glue to where the sides join together, and then I stapled the joints to keep them together while drying. Not as sturdy as when you use screws, but it is sturdy enough. This is a piece that is never moved nor handled for any reason, so the staples and the wood glue worked perfectly fine.
leaningmirror3
Once your frame is fully dried, you may give it a quick sanding and then stain it. I used dark walnut from Minwax. For a tutorial on how to apply stain, search the internet, I am sure you will find one. Lol! Now the fun part–lay the frame right side down, and lay the mirror on top facing down, just like the picture shows. The tricky part about this was making sure that the 1/4 inch distance I accounted for to sit on the frame was evenly spaced all the way around. Once I did that, I went ahead and attached these awesome mirror clips that I got from Amazon. To know what size to get you need to measure the thickness of your mirror. These are to hold a 1/4 inch thick mirror, but they also have some that are 1/8 inch for thinner mirrors. I used 8 of them, two on each corner.
leaningmirror5
I think this mirror looks best when it is just leaning, instead of hanging it like a traditional mirror. You may also distress the edges of the frame a bit with sand paper if you want it to have a more rustic and worn look.
leaningmirror6
So….that’s it. Do you have a frameless mirror laying around somewhere that could use a frame? Go for it, it is not as hard as you may think it is. Let me know if you have any other questions about this project!

How to Build Board - N - Batten Shutters

Hello friends! It’s been a while since I have shared with you another one of my easy projects, so here I am, ready to make your day! These shutters are super simple to make, and even though I don’t have pictures of every single step, I don’t think you will need them. You can make these in 1/2 a day, and once you install them on your bare window and see the transformation, you will wonder why in the world you waited so long to do this! Ready to tackle this? Let’s do it!
Materials needed:
Wood (cedar or pine work fine) – 1 inch thick X 6 inches wide boards. Make sure they are nice and straight.
Nails
Wood glue
Miter saw (or just get them cut at Lowes or Home Depot)
Hinges (optional – link below)
First, cut 6 boards (three for each panel) the length of the window (mine was 60 inches tall). Then cut 4 horizontal pieces (2 for each panel) that are the exact width of what your finished panel will be. To determine the width of your panels, just measure the width of your window and divide by half. My window was 36 inches wide, so each one of my panels ended up being about 18 inches wide. Once I had everything cut I gave all the pieces a quick sanding to make them nice and smooth.
shuttersraw1
Make sure you measure each board since the 6 inch wide measurement is closer to 5 3/4 inches than it is to 6 inches. Once you know exactly how wide your planks are you can then determine the space between the boards, which, along with the measured width of the three boards should match the length of the two horizontal pieces.shuttersraw2 Glue the top horizontal piece with wood glue and place some heavy books on it to keep it from sliding (use clamps if you already have some). Do the same thing with the bottom horizontal piece. The distance from the top and the bottom can vary–you can place the horizontal pieces on the boards before gluing them and then step back to see if it looks good to you. If not, adjust the measurement until satisfied. Keep in mind that the smaller the length of the panel the smaller the distance from the top and the bottom to the horizontal pieces. Mine were about 6 inches from the top and the bottom.
shutters 1
Once the glue dries you can turn your shutters over and nail them from the back for extra sturdiness. Use nails that are no longer than 1 3/4 inches long to make sure everything is well attached. Or you may use an electric drill and screws instead. The reason why I wait until the glue is semi dry to do this step is to keep the boards from sliding on me while I am trying to drill into them. But at the time I did not have any clamps to hold the wood steady. If you do have clamps, you can apply the glue, set the wood pieces where they need to be, clamp them, and then screw from behind.
I used a dark walnut stain from minwax that is gel based. It glides on like paint. It is one of my favorite colors for staining wood. Then I brushed a semi gloss polyurethane on the front and back since these shutters are facing south and will get a lot of sun, rain and snow. I am planning on doing the polyurethane once a year to keep the wood in the best condition possible and for the longest time.
Talking about wood, make sure you get good quality wood. Cedar is a great option if you want to spend a little more.  I bought pine to keep everything low cost. I will let you know how they are holding up after one year of facing the elements! =-)
The hardware that I used I bought from amazon. They are actually plastic hinges! Again, I wanted to spend the least amount of money, and wrought iron hinges, although beautiful, were out of my budget. These ones worked out great and they dressed up the shutters nicely.
shutters 3)
As far as hanging the shutters on the brick wall, that is one thing I did not do. We have a friend who is a contractor and he had the right drill and screws to get it all done perfectly. He spaced the shutters about an inch from the window. I wish I could tell you how to do it yourself but I have no clue! Lol!
shutters 4
Do you have any bare windows that need some dressing up? I hope you liked this simple project and that you are now pumped up to build some yourself. If there is anything you want more detail about please let me know!
Thanks for stopping by.  -Beverly

Monday, May 4, 2015

The Trunk Company - Rexburg, Idaho

I truly have to laugh when I read the title to my post. So far, I have only built two storage trunks--one for me and one to sell. My idea of selling my trunks is very far from being a "company," but I like the way it sounds. I enjoy coming up with catchy names for the businesses I will own and run in the future--like Fabric Crush, or Top-Notch Upholstery. Nothing wrong with dreaming big, right?

As I said in my previous post, I love to work with wood. After having some experience with reupholstery, I can honestly say I will make another trunk before I have to reupholster a sofa. I still love reupholstery, but with woodworking you can go straight into creating--there is no prepping stage. With reupholstery, the prepping stage cannot be avoided. Removing old, dirty, stained fabric and dealing with a million staples adds another step--and not an easy one-- before I can get to the fun part and start transforming a furniture piece. I guess I am just a little impatient, and woodworking gets me to the end much faster than I can with reupholstery.


If you are on the look out for a storage chest/trunk that will serve as a coffee table, or just storage for the end of your bed, stay tuned for a new store in town that will open at the end of this month. My trunks will be sold at this unique store, and I cannot wait for you to see them in person.  
This trunk was built with maple hardwoods and pine. 


Every trunk will be beautiful and different. I will be trying different stains, colors, and hardware to make them special and not the cookie cutter type.  On this particular one I used a custom finish for the stain--dark walnut with some other hand applied colors to give the finish some depth. 


I paid special attention to the handles, back hinges, and front latch. 
It is a beautiful piece.
I almost do not want to get rid of it, but you can only have so many storage trunks in a house 
before it starts to look ridiculous. Lol!


This is a BRAND-NEW item and up for grabs. Nothing old or refurbished was used on this baby. I carefully selected all the wood and hardware to build it just for you. 

So, what are you waiting for? =-)